The Jealous Crumpet

A sweet little blog


10 Comments

Tea for You

Untitled-1aI’ve always enjoyed the occasional cup of tea, but I never really understood how people could be as passionate about tea as I was about coffee.  That was until I was on a plane to Ireland.  The flight attendant was doing the breakfast service and asked if I wanted coffee or tea and on a whim I selected tea.

“Would you like cream?” she asked. And though I had never had cream in my tea, I thought what the heck.  The tea came in a Styrofoam cup, with cheap half and half and stirred with an ineffectual plastic straw, but it was the best tea I had ever had in my life. I couldn’t believe it. It was rich and flavorful, creamy and comforting, definitely a different experience than the stale bags of Celestial Seasonings that I was use to.untitled3My whole world expanded and I finally understood people’s passion for tea. I loved it (almost as much as coffee).  I started drinking it more frequently and was very excited when I noticed a tea room, Tea with Thee, opened up near my house.  I decided for this week’s post I would write about tea.

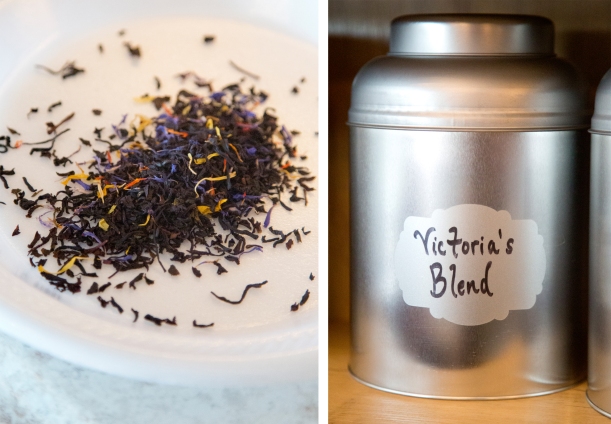
Untitled-1cOwner Vickie Barlowe was absolutely lovely.  She took the time to teach me about tea and let me photograph her beautiful shop.

If you live in the North Alabama region you should definitely visit her wonderful tea room.  You can also follow her tea room on Facebook no matter where you live.Untitled-1bThe duration and temperature you brew your tea is very important.  It is possible, especially with more delicate teas like green tea, to scourge your tea leaves.
Untitled-1dSteeping Times for the Perfect Cup of Tea:

Green Tea – 2 to 3 minutes at 167-176 °F

White Tea – 2 to 3 minutes at 149-158 °F

Oolong Tea – 3 to 4 minutes at 176-185 °F

Black Tea – 3 to 5 minutes at 210 °F

Herbal Tea – 4 to 5 minutes at 210 °F

There are different ways to steep your tea, and different products that can help you steep it. On the left is a tea ball infuser and on the right is a disposable tea steeper, which you can buy at Tea by Thee

There are different ways to steep your tea, and different products that can help you steep it. On the left is a tea ball infuser and on the right is a disposable tea steeper, which you can buy at Tea by Thee

Tea Facts:

It is believed that Chinese Emperor Shen-Nun discovered tea 5000 years ago after tea leaves accidentally blew into boiling water and made a pleasant drink.

Tea is the second most popular beverage in the world, after water.

White, Yellow, Green, Oolong, Pu-erh, and Black tea all come from the same plant: the Camellia Sinensis. The differences in the tea come from how the leaves are processed.

Black tea goes through an oxidation process called fermentation. It is the most popular tea in the United States.

Green tea is much less processed than black tea and therefore has more natural antioxidants that help prevent a myriad of diseases.

Earl Grey Tea is named after a British Prime Minister from the 1830’s.

The United States actually has a tea plantation in Charleston, South Carolina called the Charleston Tea Plantation.

untitled4Tea Etiquette

The spoon should not touch the cup when you stir your tea. Gently swish the spoon in the tea without clinking against the sides of the cup.

Do not put the spoon in your mouth or drink from the spoon.

After you have stirred your tea, remove the spoon and place it on the right of the cup on the saucer.

If you are sitting at a table, your saucer should always remain on the table. If you are not at a table, hold the saucer below the cup as you drink.

When all guests have arrived to tea, the hostess will signal the beginning of tea by placing the napkin on her lap; guests should follow suit.

If you must leave the table mid-tea, place your napkin on the chair not the table.

The hostess will signal the end of tea by placing her napkin on the table to the right of the teacup.

untitled2Scone Etiquette: 

Eat a scone by breaking small pieces off and covering the bite with a condiment as you go. Scones should be eaten with your fingers and NOT a fork.

Scones are typically eaten with clotted cream, lemon curd or a jam.

Do not dip your scone in the tea.untitled5“You can never get a cup of tea large enough or a book long enough to suit me.”

― C.S. Lewis

untitled6


8 Comments

Delectable Doggie Desserts

Gus2

After a long day at the office Gus likes an evening snack of pumpkin dog treats.

A couple of months ago I wrote and photographed a story for Rocket City Pets about Homemade Pet Treats.  I don’t own a dog, but I am a dog aunt (as in my brother has a dog, not that I am secretly a dog with a niece/nephew that also writes this blog, which would be impressive).

I was surprised to learn that you need to be very careful about what to feed your pups.  Of course I knew about chocolate, but there were plenty of other foods that I may have given a dog without thinking.  Who knew grapes were bad for our canine friends.

7 Human Foods Dogs Should NEVER Eat

Avocados

Caffeine-(I could never be a dog if it meant I had to give up coffee)

Chocolate

Grapes/Raisins

Macadamia Nuts

Milk/Dairy

Onions/Garlic

Food Styling Trick. We didn't have coffee so we had to use soy sauce. Yum.

Food Styling Trick. We didn’t have coffee so we had to use soy sauce. Yum.

Furthermore pet owners have to be careful about what store-bought treats they feed their dogs.  According to the U.S. Food and Drug Administration, since 2007 as many as 3600 dogs have reportedly gotten sick, and close to 600 dogs actually have died from eating contaminated chicken jerky treats imported from China.

Therefore it is much safer to use this recipe.  Gus, the dog in the photos and my dog nephew, LOVED the treats.  It was pretty hard to get a photo of him without him gobbling up the pumpkin goodies.

For Example: 1377244_10201518636999792_532342840_n


Gluten-Free Pumpkin Biscuits

1 cup puree pumpkin

1 teaspoon cinnamon

¼ cup water

½ cup coconut oil

4 cups brown rice flour

2 eggs

1. Combine all ingredients in a large bowl, adding more water or flour as necessary. Cover and refrigerate 1 hour.

2. Preheat oven to 350F. Roll dough out onto a surface sprinkled with brown rice flour. Roll or pat to ¼- inch thickness. Cut into desired shapes with cookie cutter. Bake 20-25 minutes or until golden. Cool completely. Store covered, at room temperature.

Bon Appétit

Gus3

Can I eat yet?

Dog Translation-“Bark Woof”1385947_10201518637439803_1052894854_n

For other Doggie Treats checkout this blog post.Gus6


2 Comments

I Scream, You Scream, We All Scream for Beer!

beer1

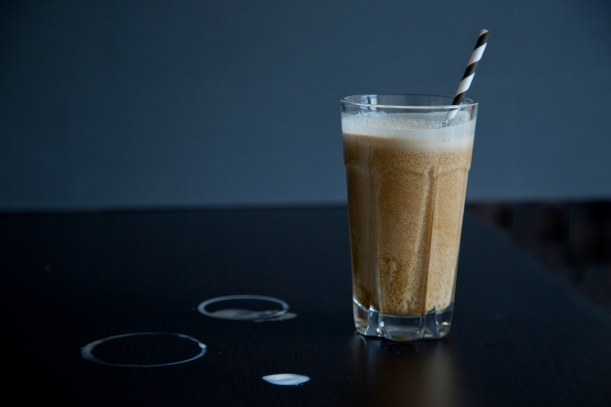
A root beer float minus the root.

This weekend I worked on a magazine article about the blossoming craft beer industry in Alabama.  It required us to visit several breweries, meet with amazing people and sample the product aka drink beer.  Hard job, but someone has to too it.beerfloatrecipeOf course all this beer sampling this left very little time for recipe development and baking, so instead I made a beer float with some ice cream and beer I had left over from the super bowl (Side Note: This year’s game was SO boring).lastfloat

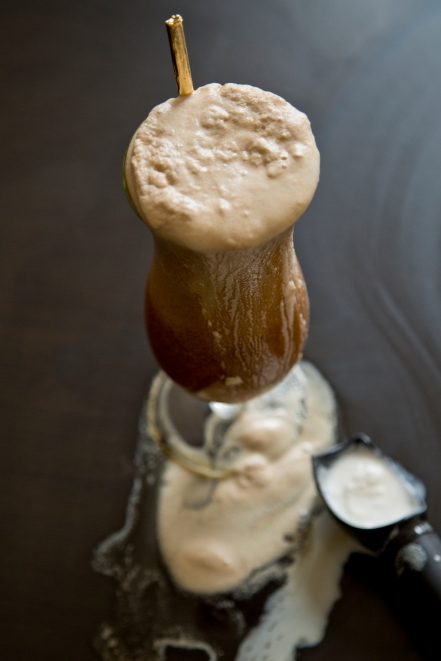
I did discover that you must gently drop the ice cream into the beer or better yet put the ice cream in the glass first, then add the beer.  Instead I hurled the ice cream into a full glass of the brew.  Not one of my finest food styling moments.   I have included a picture, as well as what I was thinking as each photo was taken.BeerFailWords(beer + ice cream)stupidity =beer explosion

1Y2B3445

Clean up on aisle 2.

 The beer float has all of the childhood nostalgia of a root beer float, with the added benefit of 7.4 alcohol content.If you use common sense (which I clearly didn’t) beer floats are easy, but you can’t just pick any beer though.  Pabst Blue Ribbon is not going to mix very well with häagen dazs.  Try to stick to a sweeter beer that has vanilla, coffee, or berry flavors to compliment the ice cream and create a fun, adult dessert.

I selected a craft beer from Yellowhammer Brewing, one of the breweries we visited.beerfloat3The beer, people and ambiance of Yellowhammer are all great, so if you are in the Huntsville, Alabama area, go this weekend.  If you have plans cancel those plans and go, you won’t regret it.  I highly recommend trying a beer flight so you can sample several of the brews.

Shots from Yellowhammer Brewing in Huntsville, Alabama.

Shots from Yellowhammer Brewing in Huntsville, Alabama.

Behind the Scenes

So for those of you that wondered about my photography, I am actually a food/lifestyle photographer in Alabama.  I have shot for numerous cookbooks and magazines.

Equipment:

Camera: I know a lot of photographers are faithful to a brand, but I am not.  If photography was a religion (and to many people it is) I would be a Mormon with several wives.  I currently shoot with Canon, but I’ve also shot with Nikon, Pentax, Hasselblad, etc. and like different aspects of each.

Tripod: Typically food photographers love natural light and I am no exception.  When shooting in general, you want to have a low ISO on your camera.  This eliminates noise, which is static from digital enhancements by the camera on the photograph.  I very rarely go above 400 ISO, which can make it hard if you don’t have enough natural light, so I shoot with a tripod.  I would say 90% of my food photography is done on a tripod.  The beer float shots where shot at 1/4 a second and 400 ISO, which would be too slow to handhold.

Reflector: Usually natural light is from one light source (a window) so one part of your dish will be lit, but the other side will be in the dark.  You can brighten the dark side of the food with a reflector, bouncing the light from the window on the dark side.  Though I own professional reflectors I also use sheets of computer paper or aluminum foil to even the light out.

Here is a photo of my set up, as well as the shot I took with the setup.  I also like to work on the cheap, as you can tell from my paint can table.reflector

finished

I hope I was clear.  Please comment if you have any questions.


3 Comments

Roasted Butternut Squash Pie: 3 Ingredient Challenge

Butternut Squash Pie

So for this week’s post I was challenged by the talent blogger, Christi, of DirtPlate.com to create a recipe using 3 seasonal ingredients.  Christi would do the same for her blog and post on the same day.   It was a bit like a small-scale version of The Iron Chef minus time constraints.

At a local farm we were able to get a variety of winter squashes, nutmeg and cinnamon.  Perfect for desserts or, in Dirt Plate’s case, healthy eating.

The 3 Ingredients: Cinnamon, Winter Squash, Nutmeg

The 3 Ingredients: Cinnamon, Winter Squash, Nutmeg

Screw Cake, Let Them Eat Pie!

Screw Cake, Let Them Eat Pie!

I’m not usually a fan of pumpkin pie, so I was not thrilled with the prospect of a squash pie, but it was AMAZING!!  I am a huge fan of this recipe.

3.1415926535897932384626433832795028841971693993751

3.1415926535897932384626433832795028841971693993751

Dirt Plate created a beautiful roasted winter squash pecan salad with goat cheese.  Yum!!  I know what I am making with my extra butternut squash.  Get the recipe at: Dirtplate.com.

This was the shot right before I dropped a piece of camera equipment on the pie and ended the photography for the day.

This was the shot right before I dropped a piece of camera equipment on the pie and ended the photography for the day.


Working with sugar requires patience and when that fails lots of swearing.

Working with sugar requires patience and when that fails lots of swearing.

Confession: See the lovely ‘pie’ written is sugar, that was a complete disaster to do.  I had a plan to create an ornate pattern in sugar.  I saw it on Pinterest (damn you pinterest) and thought it looked SO easy. False!  If I dumped a cup of sugar directly on top of the pie I could not have done a worse job.  I used too much sugar, the pie was sticky, my pattern was too ornate, etc etc.  Sugar was everywhere, on the counter, on the floor, in my hair somehow.  I should have taken photos, but I was too busy swearing and cursing the day that I ever discovered Pinterest.  I managed to clean up the plague of sugar, simplify my pattern to ‘pie’ and get a half decent decoration.  

Recipe below.

This sugar spoon will NOT help you create ANYTHING!!

This sugar spoon will NOT help you create ANYTHING!!

Roasted Butternut Squash Pie

1 ½ pounds butternut squash, peeled, seeded, and cubed

6 tablespoons butter, melted, divided

1 ½ cups cinnamon graham cracker crumbs (about 12 crackers)

1 tablespoon granulated sugar

3 large eggs

¾ cup packed brown sugar

½ cup whipping cream

¼ teaspoon salt

¼ teaspoon freshly ground nutmeg

½ teaspoon ground cinnamon

Garnishes: whipped cream, nutmeg

1. Heat oven to 425F. Place squash on a baking sheet; toss with 2 tablespoons melted butter. Bake 15-20 minutes or until squash is tender. Let cool.

2. Reduce oven temperature to 350F. In a medium bowl, stir together graham cracker crumbs and granulated sugar. Add remaining 4 tablespoons butter, stirring until crumbs are moistened. Press mixture into a 9-inch pie plate. Bake 8 to 10 minutes or until lightly browned. Cool.

3. Place squash in a food processor and process until smooth, about 60 seconds. Add eggs, brown sugar, cream, salt, nutmeg, and cinnamon; process until smooth. Pour filling into crust. Bake at 350F until set, 35 to 40 minutes. Cool completely. Chill 3 hours or overnight. Serve with whipped cream and a sprinkle of fresh nutmeg.

Too Late!

Too Late!

Bon appetite


6 Comments

Cream Puffs AKA Choux à la Crème AKA Yummy Goodness

cp3

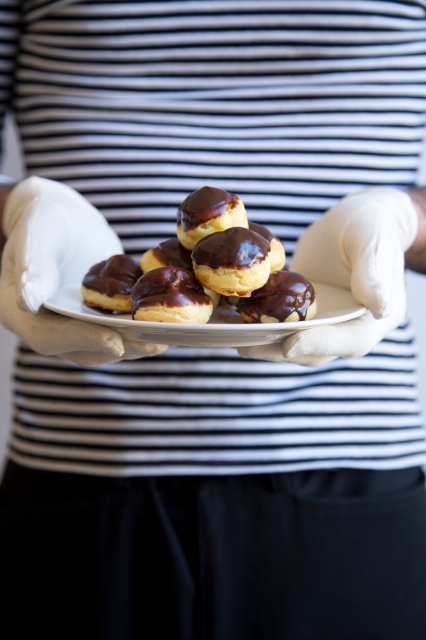
Special shout out to my husband who let me dress him like a mime for this shoot.

Cream Puff or Choux à la Crème is a french pastry.   They are sometime called profiteroles or chouquettes, but in all cases they are delicious and if you see some you should drop what you are doing and eat them immediately.

If you believe wikipedia (and I usually do, with only a small amount of skepticism) the original reason for calling a pastry  profiteroles has been lost in the centuries since its origin, but it later came to mean a roll baked under ashes.  Which I guess makes sense.

The dough used to make a cream puff is called  pâte à choux and used in tons of decadent french pastries, such as éclairs, beignets, and crullers.  Another interesting thing is that in french the word choux is plural for cabbage.  I am guessing this is because the little buns look a bit like cabbages, but I don’t know for sure.cp4


I’d eaten cream puffs before, but the best ones I ever had were at my wedding.  My husband is french, so when we got married I begrudging agreed to have the wedding in France (just kidding, I was over the moon to get married in France).

cp2

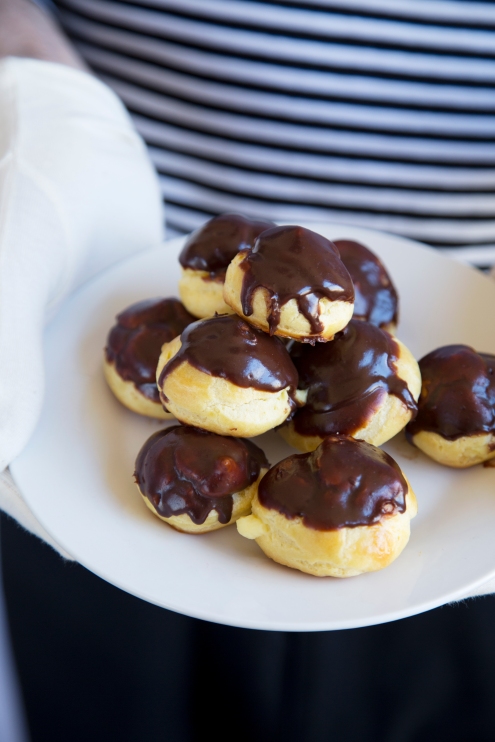
Look at all that yummy chocolate.

My in-laws were a bit concerned about my expectations for the wedding cake, because they said the traditional french wedding cake was quite different from what we had in the states.  They explained to me that a traditional french wedding cakes is called a croquembouche and is a tower of cream puffs, garnished with candied almonds and sugar flowers, wrapped with a spun sugar.  Um, yes please.  It was as AMAZING as it sounds.  Please see the photos below as evidence.cp1Disclaimer: I wanted to have a stereotypical image of France in the photo with my french pastries, hence dressing my husband as a mime, but on the occasions that I have been to France there is a shocking lack of mimes roaming the streets.  In the states we believe there are mimes EVERYWHERE but I’ve only seen two there, and they were not so much mimes and a people dressed in gold or silver standing really still.  My husband insisted that these were mimes, but I was adamant that no, mimes wear striped shirts, a beret, and try to escape invisible boxes, anything different is not a mime.cp6

Below is a recipe so you can make your own cream puffs.  Bon appétit!

Cream Puffs/Choux à la crème/Profiterole

Filling:

2 ½ cups whole milk

2/3 cup granulated sugar

3 tablespoons unsalted butter

1 vanilla bean, split or 2 teaspoons vanilla extract

6 large egg yolks

1/3 cup cornstarch

Dough/Pate A Choux:

½ cup whole milk

½ cup water

½ cup unsalted butter

1 teaspoon granulated sugar

½ teaspoon salt

1 cup all-purpose flour

4 large eggs, lightly beaten, at room temperature

1 egg, lightly beaten

Glaze:

½ cup whipping cream

4 ounces semi sweet chocolate, chopped

  1. To make the filling, in a medium saucepan, combine the milk, sugar, butter, and vanilla bean (scraping seeds and adding to the pot), if using. In a medium bowl, whisk egg yolks and cornstarch. Bring milk mixture to a boil over medium-high heat. Gradually whisk hot milk mixture in a small stream into the egg yolk mixture. Slowly whisk egg mixture back into the pan. Cook, whisking constantly, over medium-high heat 1 minute or until thickened. Remove from heat; discard vanilla bean if using or whisk in vanilla extract if not using vanilla bean. Pour into a bowl; place plastic wrap over top. Chill 2 hours or until cold.
  2. Heat oven to 350F. In a medium saucepan, bring milk, water, butter, sugar, and salt to a boil over medium-high heat. Whisk in flour; cook, stirring constantly, 1 minute. Transfer mixture to a heavy duty stand mixing bowl fitted with a paddle attachment. On low speed, add egg a little at a time, beating until all egg is completely absorbed before adding more. Dough should be smooth and glossy and slowly fall off the mixing blade and form a point (like a bird’s beak) when it is ready. All of the beaten egg may not be needed.
  3. Spoon mixture into a pastry bag fitted with a round piping tip (about ½ inch wide). Pipe 2-inch balls. Allow 2 inches of space between the dough, as it will expand when baking. Brush with beaten egg. Bake for 20 minutes or until golden brown and dry. Cool completely.
  4. Place filling in a pastry bag fitted with a medium-sized round tip. Insert tip into bottom of each éclair and gently squeeze piping bag to fill cavity (do not stuff full).

Heat whipping cream on stove top or microwave on high 30-60 seconds until boiling; pour over chopped chocolate. Stir until smooth. Dip tops of éclairs into chocolate, letting excess drip off. Serve immediately or refrigerate until ready to serve.cp7


2 Comments

RED: Red Velvet Cake Recipe with an Arthropod Twist

rv3

Red Velvet Cake

Cake:

2 ½ cups cake flour

1 ½ cups granulated sugar

1 teaspoon baking soda

1 teaspoon salt

1 ½ teaspoons cocoa powder

1 ½ cups vegetable oil

1 cup buttermilk

2 large eggs

1 (1 ounce) bottle red food coloring

1 teaspoon white vinegar

1 teaspoon vanilla extract

Frosting:

2 (8 ounce) packages cream cheese, softened

1 cup (2 sticks) butter, softened

4 cups powdered sugar

1 teaspoon vanilla extract

1. Heat oven to 350F. Line the bottom of 3 (8 inch) round baking pans with cooking parchment paper or grease and flour the pans. In a large bowl, whisk together flour, granulated sugar, baking soda, salt, and cocoa powder.

2. In a medium bowl, whisk together vegetable oil, buttermilk, eggs, food coloring, vinegar, and vanilla. Add to dry ingredients, stirring just until combined. Divide batter evenly among prepared pans. Bake 15-20 minutes or until a toothpick inserted in the center of the cake comes out clean. (cake will also slightly pull away from sides of pan. This is a very moist cake so it will not be totally dry when pressed with a finger. My time of 15-20 min is a guess so you may need to check and change it!)

3. Cool cakes in pans 10 minutes; remove to wire racks to cool completely. (this is important. Cakes will be soggy and difficult to remove if they are allowed to completely cool in the pans. However, if you try to remove them from the pans right out of the oven they are more likely to stick to the pan)

4. To make the frosting, beat cream cheese and butter with a mixer on medium speed 1 minute or until creamy. Gradually beat in powdered sugar until smooth. Beat in vanilla. (sometimes I turn the mixer up to high and beat for a minute or two to get out powdered sugar lumps). Use frosting between layers and to frost the outside of the cake. Store, covered, in the refrigerator. Let stand at room temperature at least 1 hour before serving.

To read about Red Food Dyes Click Here!

rv2